 五隆兴科技发展有限公司
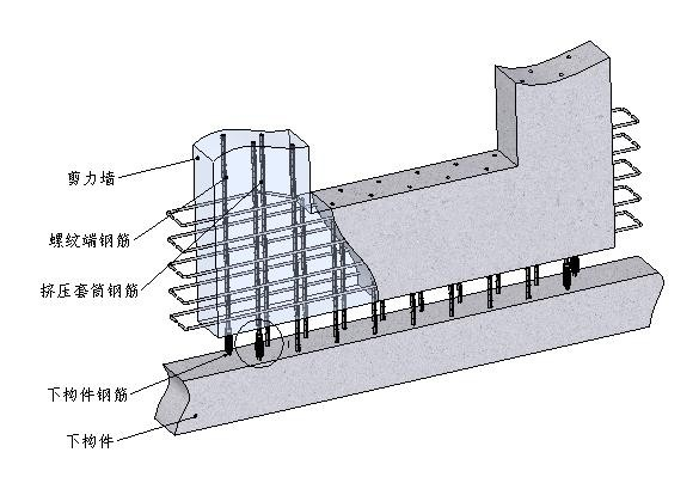
Installation and connection of shear wall panel step 1: (post pouring concrete)
- Before the installation of shear wallboard, clean the installation position of wallboard and remove the protective plug outside the lower inner screw sleeve;
- A gap of 250-300mm (according to the design requirements) shall be reserved between the precast shear wall panel and the surface of the lower member, and the panel shall be hoisted in place;
- The double screw socket joints of reinforcement connection at the connecting surface of the slab are in place (see Fig. 1);
- Support the formwork and pour concrete at the post cast strip;
- The formwork shall be removed after the concrete strength reaches the formwork removal strength. So far, the installation and connection of components are completed.
Installation and connection of shear wall panel step 2: (post grouting)
- Before the installation of shear wallboard, clean the installation position of wallboard and remove the protective plug outside the lower inner screw sleeve;
- 20 mm (according to the design requirements) clearance shall be reserved between the precast shear wall panel and the surface of the lower component, and the panel shall be hoisted in place;
- The double screw sleeve joints of reinforcement connection at the connecting surface of the plate are in place (see Fig. 1), and the connecting nut is locked;
- Grouting material shall be poured at the post cast strip;
- After the strength of grouting material reaches the strength, the wall panel support can be removed, and the installation and connection of components are completed.
![[stiff column] the performance of double screw sleeve instead of welding is incredible!](https://www.bjwlx.com/en/wp-content/uploads/2021/08/1-150x150.png "[stiff column] the performance of double screw sleeve instead of welding is incredible!")


